Development
PControl Modular Part #6
I’ve been busy building prototypes, creating build instructions, sourcing parts and programming throughout the last weeks.
Now i want you to see how a sandwich is done:
How to make a sandwich
This is not as funny as it sounds because its a major step to success. If you do something wrong it just does not look good – which cannot be fixed later…
If you plan to build a rack-edition or use a combined controller/display combination in addition to footswitches – you will make a sandwich.
To do that right bring together the male and female connectors, put them into the lower board and carefully align and place the top board. Then solder at least one pin on each connector, check alignment, turn the whole sandwich and solder one from the bottom sode. Check again!
Last solder all other pins and you will have a perfectly aligned sandwich 🙂 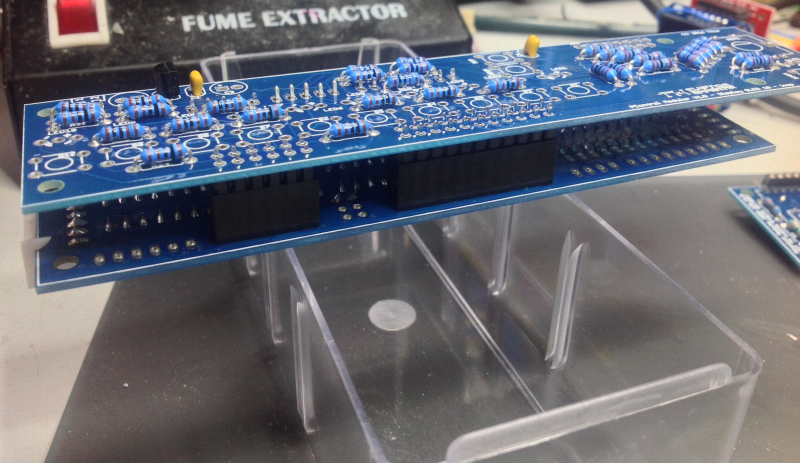
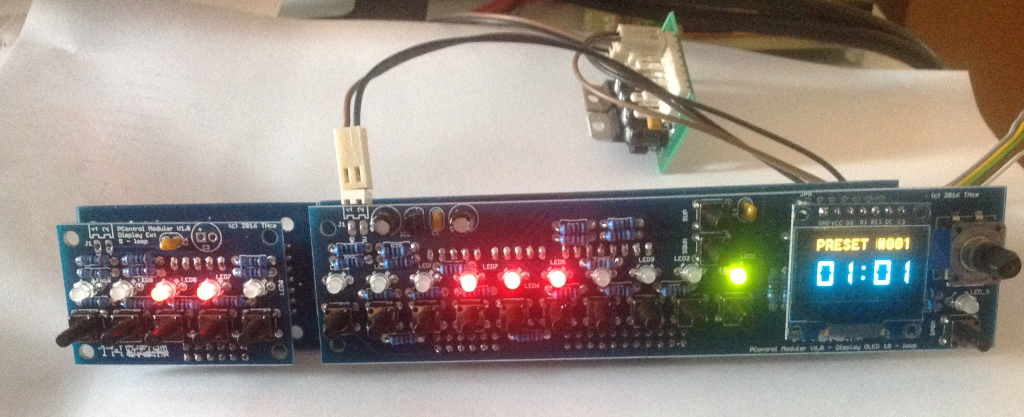
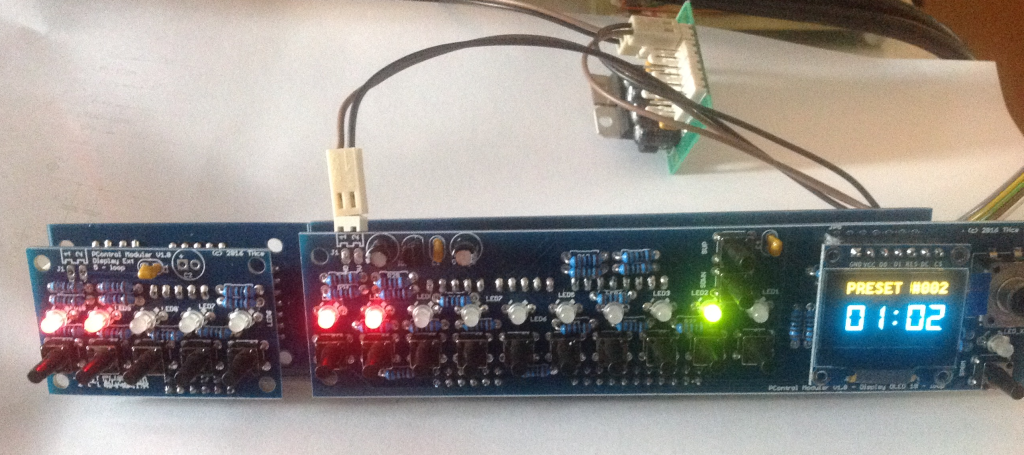
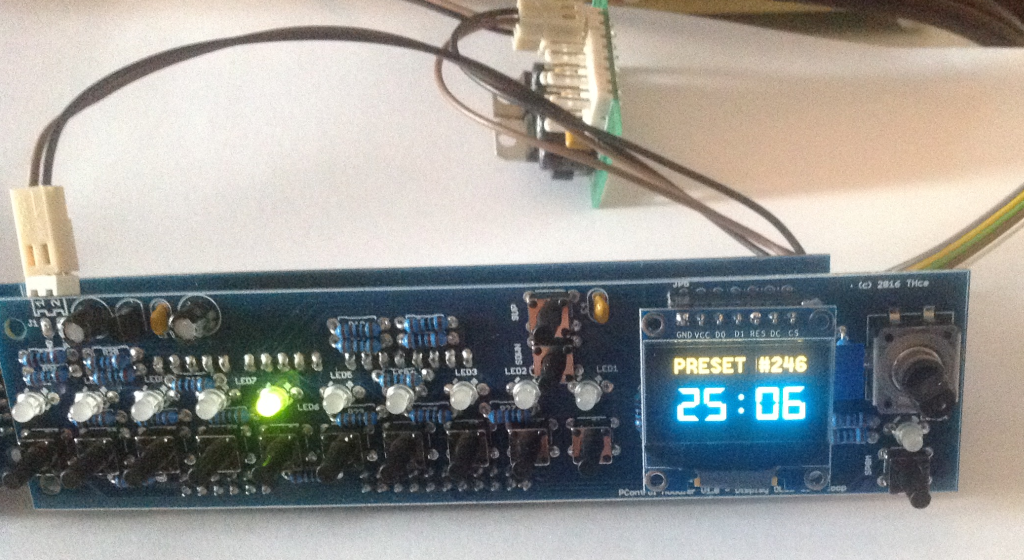
First light
A few pictures taken on my workbench showing some functionality.
Please note that I have choosen to do the programming on my workbench with the sandwiched version to minimize space needed on the table. I will show a more pedalboard-like version next time.
Selected patch 1 on bank1
Select patch 2 an bank 1
Select patch 6 on bank 25 🙂 – notice something? I just upped the max number of patches to 250. They can be organized in 25 banks of 10 or 50 banks of 5.
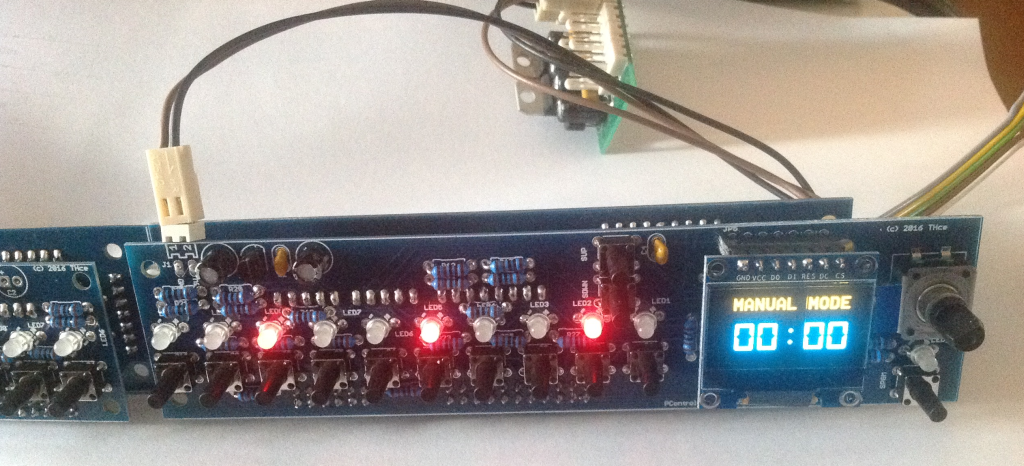
Showing manual mode:
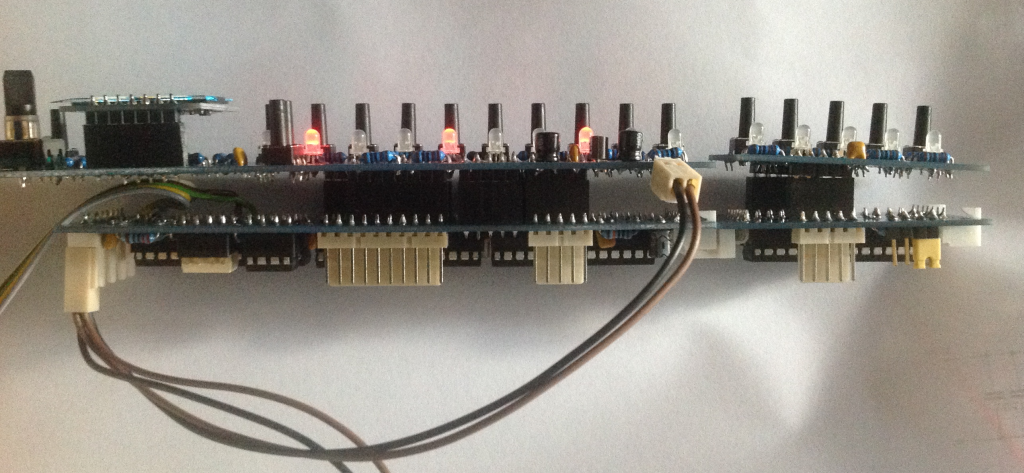
And a nice view of the sandwich again. You can see the relay connectors on the backside.
Next step will be to do some new designs on a few boards to optimize a few things that have to do with mounting and the power connectors.
Stay tuned!
Looking forward to seeing this project ready for my feet 🙂
Ehi Thomas, AMAZING WORK! Do you know when and if you will go on with this projeckt?
Sorry. There is no time to finalize it at the moment.