DIY
PRS SE20 combo overhaul

19
Dec
Dec
While looking for a new tube amp I came across an offer where the seller managed to spill a can of epoxy across the amp which resulted in this:


However, it was reasonably priced and I gave it a shot. It looked even worse in real light.
First I tested it and found a few other things that need fixing.
- The distortion sounded a little crackling/fizzy
- The reverb had a metallic sound
- There was far too much bass in the Lead channel
But thats for later. Optics first!
So I took it apart and removed the tolex.


Its a very basic made China enclosure out of cheap plywood.
The overall craftmanship is ok but there are typical chinese building processes at work you want to eliminate. First thing to name is the wire to the internal loudspeaker which is not removable as the jack is fixed to the cable which runs through a metal sheet at the back and through a hot-glued hole to the lower compartment of the box where it is soldered to the speaker. This means that the metal piece is dangling at the backside when you remove the amp chassis or while replacing tubes.
The amp chassis is wired very well with panel mounted pots and jacks at the front and the back. the circuit is on well made PCB with board mounted tube sockets. Unfortunately this makes changes to the circuit hard as you need to remove the whole PCB to be able to solder components from the backside.
as usual: THERE IS LETHAL VOLTAGE INSIDE THE TUBE AMP EVEN WHEN THE CORD IS REMOVED. DO NOT TOUCH ANY PARTS IF YOU ARE NOT AN EDUCATED ELECTRICIAN!
lets have a look:


But i will tamper with the sound later.
For now lets start with optics. I ordered new burgundry tolex for some optical highlights.
looks like this now:


Ordered some ostrich tolex for the box itself and applied it.
Great quality stuff!
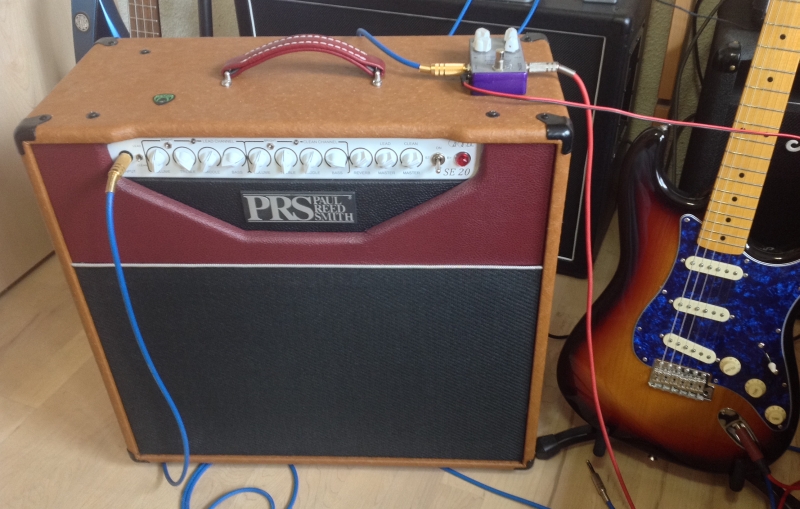
This is how it looks now:


Thats it for the looks.
Now lets look at the electric refinement.
There are a few things to address:
- Fizzy/Crackling Distortion
- Reverb Tank
- Too much bass
- Too much gain in the clean channel
While I was looking at the chinese soldering craftmanship I found this:
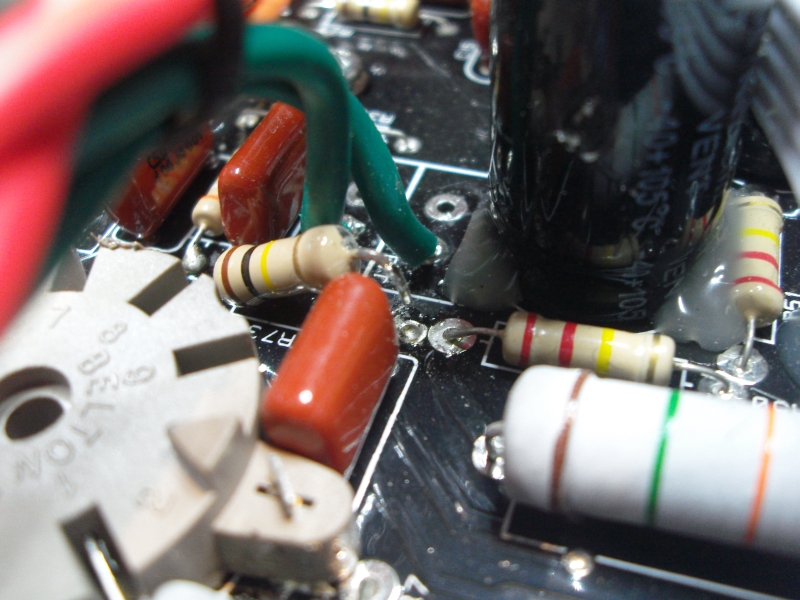
One leg of R73 was not soldered into its hole. Not sure how this can escape a decent quality control but who knows.
So, fixing this got the amp rid of the Crackling/fizzing distortion.
That was an easy one 🙂
Too much bass
I was looking at the two tone stacks that make up the tone controls of the amp.
The first one sits prior to the amplification in the clean channel. With my Les Paul I get too boomy sound and need to reduce the bass to the first quarter. I will try with single coil again to not do anything too much which shuts out other style guitars.
The second one sits after the lead channel. Again, using a LP guitar hits you in the stomach even with bass in the first quarter. Turning the pot furter CCW will do it. I also will try with single coils here again.
I used a tone stack calculator to find different cap values while keeping the existing pots in place and ordered them. Once they get here I will replace the existing parts and give it another try.
After fixing the disconnected resistor:
Playing Tele, Strat and LP guitars through it again makes me think that the above mentioned resistor-fix made the sound jump from abysmal to good 🙂
However, I will still address the too much bass issue and somehow try to make the clean channel more clean but keep the now existing overdrive character.
This is about less gain:
Lowering the gain needs to take part in the channels separately. Unfortunately they share a common tube pentode as input driver, so changing the input tube will affect both channels.
CLEAN channel:
In general I like the sound of the overdriven clean channel but the problem is that if you run pedals in the front of your amp you likely want to stay it clean as long as it goes. So the task was to get the same kind of distortion but at a later volume level of the channel.
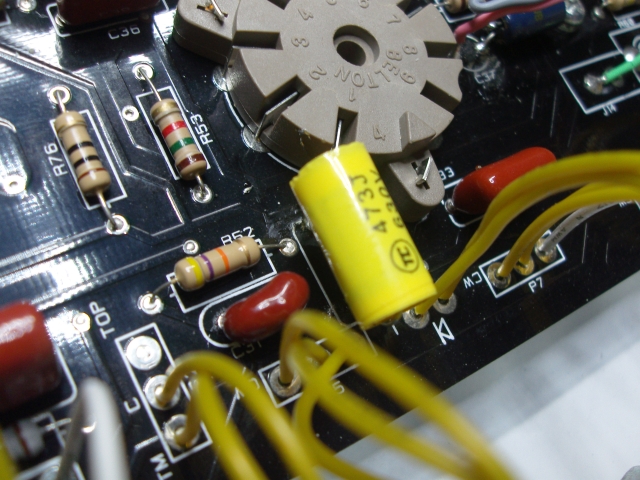
To do that I used a EHX 12AT7 tube in the clean position which I swapped in for the existing TungSol 12AX7. I also tried out to bring the distortion further down by making C37 switchable as shown in the pics below.
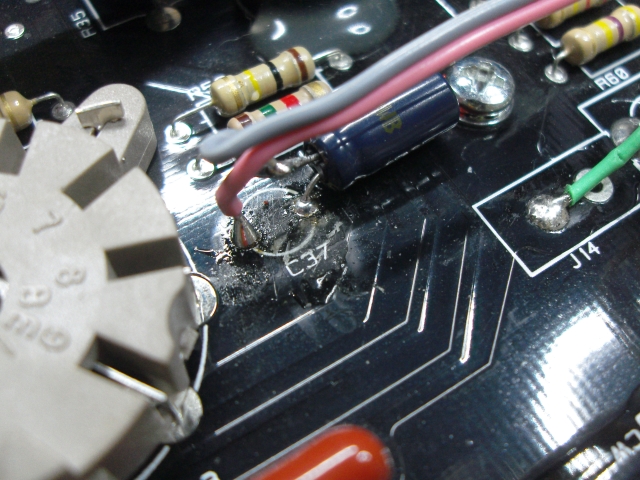
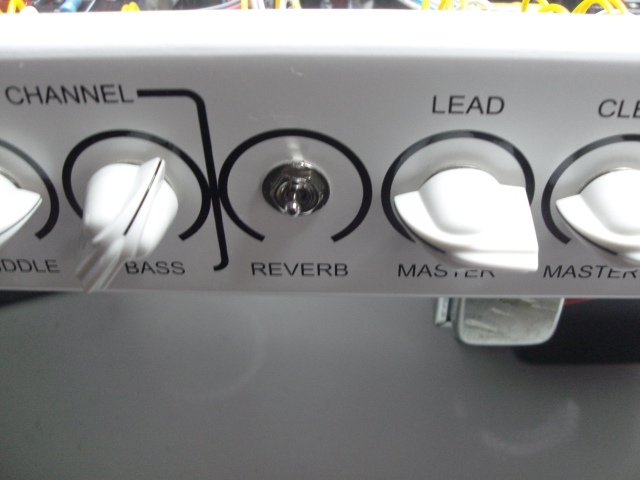
I used the reverb pot hole to temporary mount a switch to the front panel to be able to try it directly while playing. Indeed removing the cap from the circuit gets you another quarter of volume until distortion sets in. In the end I decided to swap the existing 22uF cap for a fixed 10uF cap without the switching option. But if you are after an almost fully clean channel you might consider removing C37 from your amp by desoldering it. Also using a 12AU7 tube can be considered but I didnt like the sound here.
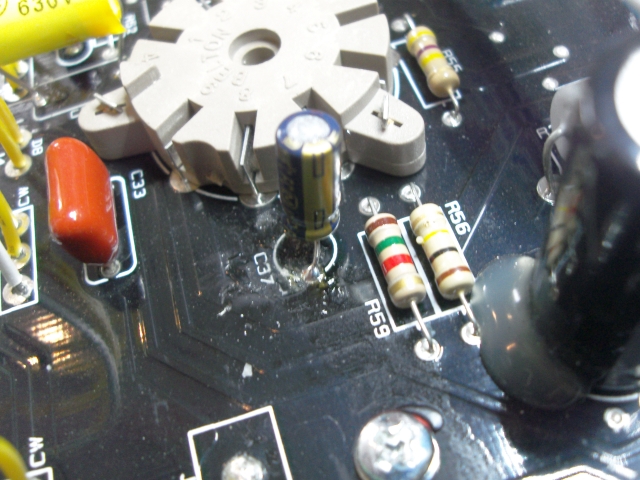
This is how my setup looks now:
LEAD channel:
If you are fine with the very heavy distortion you get from the lead channel, leave it as it is. I decided to bring it down a little and swaped two tubes:
I used the TungSol 12AX7 tube from the clean channel and put it into position I (which is the LeadII marking on the chassis picture above as I was only guessing the tubes there when I marked them – and I guessed wrong 😮 )
I also swapped out the other 12AX7 tube with a Sovtec 5751 I had.
The gain is brought down to heavy rock-level at its best. You may still get heavy metal riffs out of it but you will need very hot pickups to do so.
This is about tone-shaping:
The too much bass-topic again.
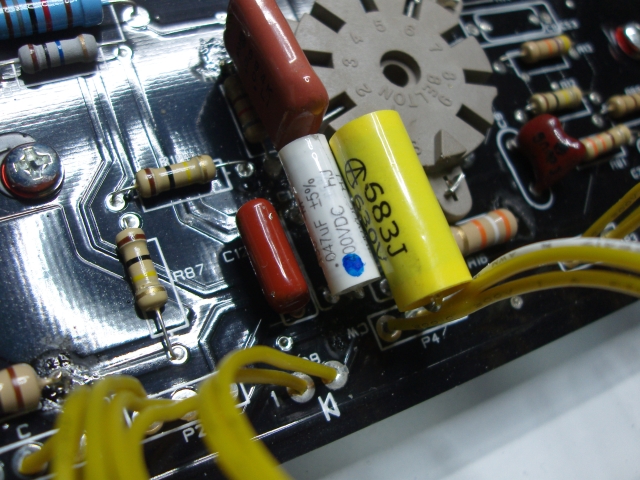
After fiddling with the tone stack calculator and some real playing with different cap values I ended up with the following:
CLEAN channel:
The tonestack used here is a Fender-Type stack with mostly standard values. Unfortunately the bass frequency meets the resonance frequency of the box, leading to boomy sounds when playing the lower register. In the end I only altered the bass frequency of the tonestack by lowering it and therefore moving it away from the enclosures resonance. There are now punchy basslines to be played without booming frequencies.
C32 has been changed to 47nF from 100nF.
LEAD Channel:
The lead channel got more complicated. Its a marshall-Type tonestack also using mostly standard values. After a lot of testing I turned into a Fender-Type tonestack by connecting lug 2 and 3 of the pot. Also C10 was changed to 47nF from 22nF and C11 was changed to 68nF from 47nF.
This also removed the boomy resonance and gets you a more defined tone in the lower frequency range.
The reverb tank
I still dont like the built in reverb very much but there’s nothing easier than to turn it off and use something to my liking in the FX-path 🙂
Only thing left to do is installing the new red handle comming and other knobs. Once here I will post the final picture of this project.
Finally:
A really great amp. My favourite one to play at home.
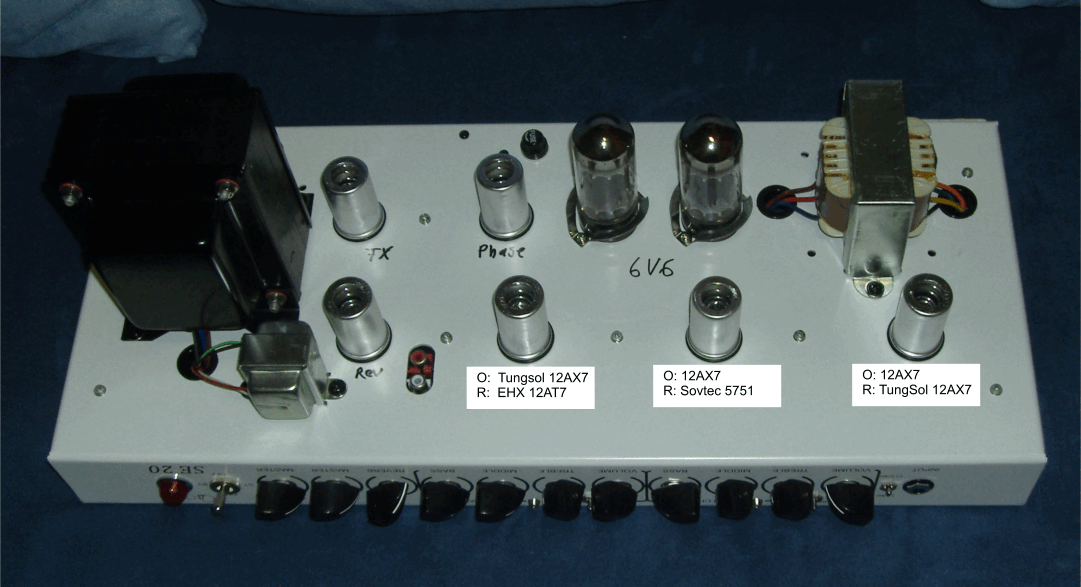
Tube swap picture
Here is the picture with the tube swaps from the comment below (click to enlarge):
Hi, going to try your tube subs. Could you confirm which position for each change as identified on the board ? Thanks!
I have added a picture with the original and replacement parts indicated. That should make it easier to understand.
Thanks, that’s perfect. Sorry if i was a little slow…
Let us know what you think of the changes. 🙂
Great mods!! Have a SE20 cumming my way this week. Had this amp once and really regret returning that one.
About the tone stack lead channel. you write that you connect lugs 2 and 3. Is that from the bass pot?
And did you do all the mods without removing the PCB?
Regards,
Ad
Its the mid-pot. The only difference between a Fender and a Marshall-Style tonestack is how th emid-pot is wired. And yes, I did all the mods without removing the PCB. As long as you feed new solder from the top you can easily remove/replace parts.
I did the tube swap and the amp sounds much better, plus I had already replaced the speaker with a Celestian Creamback 65w
RE turning off the reverb tank
How’d you do that … Via the foot switch circuit or other method?
My reverb is non-functional and as far as I can tell it’s not the tubes or the tank so I can’t figure it out. Less power on the clean channel but it still sounds good?
Any ideas would be appreciated!
Either via foot switch or you just can pull the RCA plugs comming from the reverb unit to make it permanent.
the reverb in my SE-20 works sometimes and other times it doesn’t..
also, any mods like this for a Jet City 5012c ??
This can be anything from the reverb tube circuit, contact problems of the plug or a defective reverb tank.
I don’t have that many tube amps to be able to provide much help for your question. Sorry.
are the FX, Phase, and rev tubes 12AT7’s ?
Yes, they are 12AT7
My SE 30 combo had a problem with the reverb and I had to replace the RCA connector lead between the tank and amp to cure it.